- Introduction
- Step one: Access the HP Embedded Web Server (EWS)
- Step two: Set up Protect Stored Data
- Step three: Complete the setup
There are several methods to protect data stored on the printer hard drive(s). One of the best solutions is to purchase a printer with an encrypted drive or upgrade to an encrypted drive if the option is available.
The data on an encrypted drive is not accessible if removed from the printer. Data on the drive should be erased prior to donating, recycling, or transferring ownership of this printer. To ensure that print or scan job images are not retained on the hard drive (until overwritten by another job) select a secure file erase mode in the Managing Temporary Job Files area of the Protect Stored Data page.

NOTE:If a job is in process at the same time a data erase mode operation is initiated, the job will complete before the data erase operation begins.
- 1.
- 2.
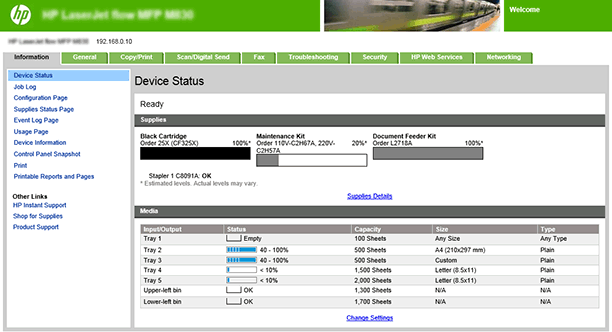
Open a Web browser, and in the address line, type the IP address or host name of the printer exactly as it displays on the printer control panel. Press the Enter key on the computer keyboard. The EWS opens.


NOTE:If the Web browser displays a message indicating that accessing the website might not be safe, select the option to continue to the website. Accessing this website will not harm the computer.

- Drive Status
- Erase Job Data
- Change Password for Encrypted Drives
- Managing Temporary Job Files
- Manage Stored Jobs
Click on the Security tab, and then select Protect Stored Data to access the Drive Status in the EWS.
The Drive Status area of the Protect Stored Data page contains the following information about each drive installed on the printer:
- •
- •
- •
- •
If multiple drives are installed on the printer, use this Drive Status area to specify which drive the printer uses by using the Use Drive... operation and also to perform an Erase Drive... operation on a specified drive.
Types of data erase modes available for performing a data erase operation:
- •
- •
- •
Data erased when performing a data erase operation:
- •
- •
- •
Perform an Erase Job Data operation:
- 1.
- 2.
At the bottom of the page, click the Apply button.

NOTE:The printer automatically restarts after the Erase Job Data operation completes. The printer control panel displays the splash screen while the operation is in progress. Erase Job Data operations can take varying lengths of time, from minutes to hours, depending on the amount of data being erased.
If an EIO drive is installed on the printer, its information will be displayed in the Drive Status section and a Change Password... button will be available in the Change Password for Encrypted Drives area.
Generate a new random password for all encrypted drives:
- 1.
- 2.
Manually set a new password for all encrypted drives:
- 1.
- 2.
- 3.
Use the Managing Temporary Job Files area to set the data erase mode used when temporary job files are erased during a data erase operation.
The following types of data erase modes are available for data erase operations on temporary job files:
- •
- •
- •
Use the Manage Stored Jobs area to manage settings for jobs stored on the printer and for Quick Copy jobs; stored jobs sent from the print driver.
The following settings are available for configuration:
- •
- •
- •
- •
- •
Click the Apply button to save any changes made on the Protect Stored Data page.
On the Protect Stored Data page, review the selected settings, and then click Apply to complete the setup.
 button to display the IP address or host name.