| 1. |
| Click the Networking tab.
|
|
| 2. |
| If it is not already selected, click TCP/IP Settings in the left navigation pane.
|
|
| 3. |
| Click the Network Identification tab.
|
|
| 4. |
| If DNS is required on the network, in the TCP/IP Domain Suffix area, verify that the DNS suffix for the email client being used is listed. DNS suffixes have this format: companyname.com, gmail.com, etc.
|

 |
NOTE: |
If the Domain Name suffix is not set up, use the IP address.
|
|
| 5. |
|
| 6. |
| Click the Scan/Digital Send tab.
|
|
| 7. |
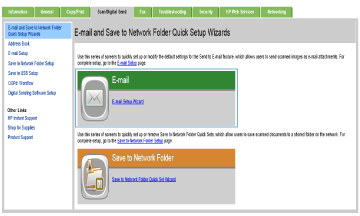
| Click the E-mail Setup Wizard link.
|

|
| 8. |
| On the E-mail Setup Wizard dialog, click Continue to proceed with the configuration.
|
|
| 9. |
| On the Outgoing E-mail Servers (SMTP) dialog, complete the steps for one of the following options:
|
| ● |
| Option one: Search network for outgoing e-mail server:
|
 |
NOTE: |
This option finds outgoing SMTP servers inside your firewall only.
|
| 1. |
| Select Search network for outgoing e-mail server, and then click Next |
|
| 2. |
| Select the appropriate server from the Finding SMTP servers list, and then click Next.
|
|
| 3. |
| Select the option that describes the serverís authentication requirements:
|
| ● |
| Server does not require authentication, and then click Next.
|
|
| ● |
| Server requires authentication |
| ◦ |
| From the drop-down box, select Use credentials of user to connect after Sign In at the control panel, and then click Next.
|
|
| ◦ |
| From the drop-down box, select Always use these credentials, enter the Username and Password, and then click Next.
|
|
|
|
|
| ● |
| Option two: Add SMTP server:
|
| 1. |
|
| 2. |
| Enter the Server Name and Port Number, and then click Next.
|
 |
NOTE: |
In most cases, the default port number does not need to be changed.
|
 |
NOTE: |
If you are using a hosted SMTP service such as gmail, verify the SMTP address, port number, and SSL settings from the service
providerís Web site or other sources. Typically, for gmail, the SMTP address is smtp.gmail.com, port number 465, and the SSL
should be enabled.
Please refer to online sources to confirm these server settings are current and valid at the time of configuration.
|
|
| 3. |
| Select the option that describes the serverís authentication requirements:
|
| ● |
| Server does not require authentication, and then click Next.
|
|
| ● |
| Server requires authentication |
| ◦ |
| From the drop-down box, select Use credentials of user to connect after Sign In at the control panel, and then click Next.
|
|
| ◦ |
| From the drop-down box, select Always use these credentials, enter the Username and Password, and then click Next.
|
|
|
|
|
|
| 10. |
| On the Configure E-mail Settings dialog, enter the information about the From email address, the subject line of the email, and the default message, and then
click Next.
|
 |
NOTE: |
When setting up the address fields, if the User editable check box is unchecked, users will not be able to edit those fields at the product control panel when sending an email.
|
|
|
|
|
|
| Select one of the following:
|
| ● |
| Userís address (sign-in required) |
|
| ● |
| ◦ |
| Default From: and Default Display Name: |
Provide an email address and name to use for the email message.
 |
TIP: |
Create an email account for the product, and use this address for the default email address.
|
 |
TIP: |
Configure the email feature so that users must sign in before using it. This prevents users from sending an email from an
address that is not their own.
|
|
|
|
|
|
| Provide a default subject line for the email messages.
|
|
|
|
| To use this message for all emails sent from the product, clear the User editable check box for Message:.
|
|
|
| 11. |
| On the Configure File Scan Settings dialog, set the default scanning preferences, and then click Next.
|
|
| 12. |
| Review the Summary dialog, and then click Finish to complete the setup.
|
|
